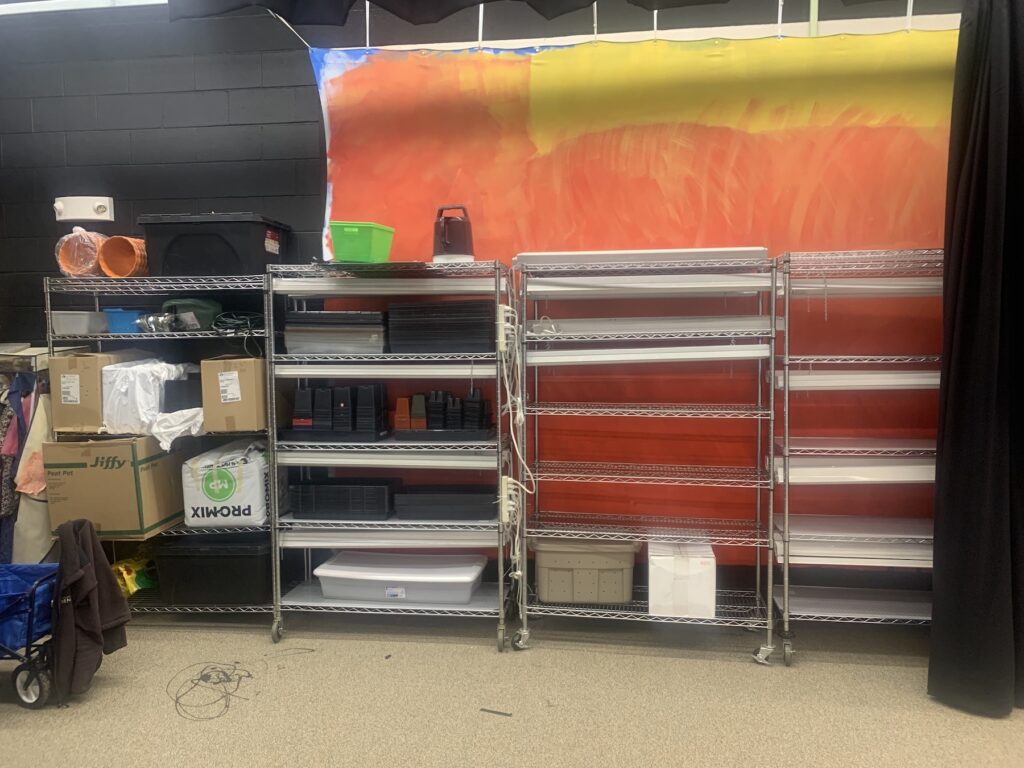
This morning I stopped by one of the schools that I work at to take inventory of our seed starting equipment so I could purchase anything new that was needed. Thankfully we don’t need much other than soil this year!
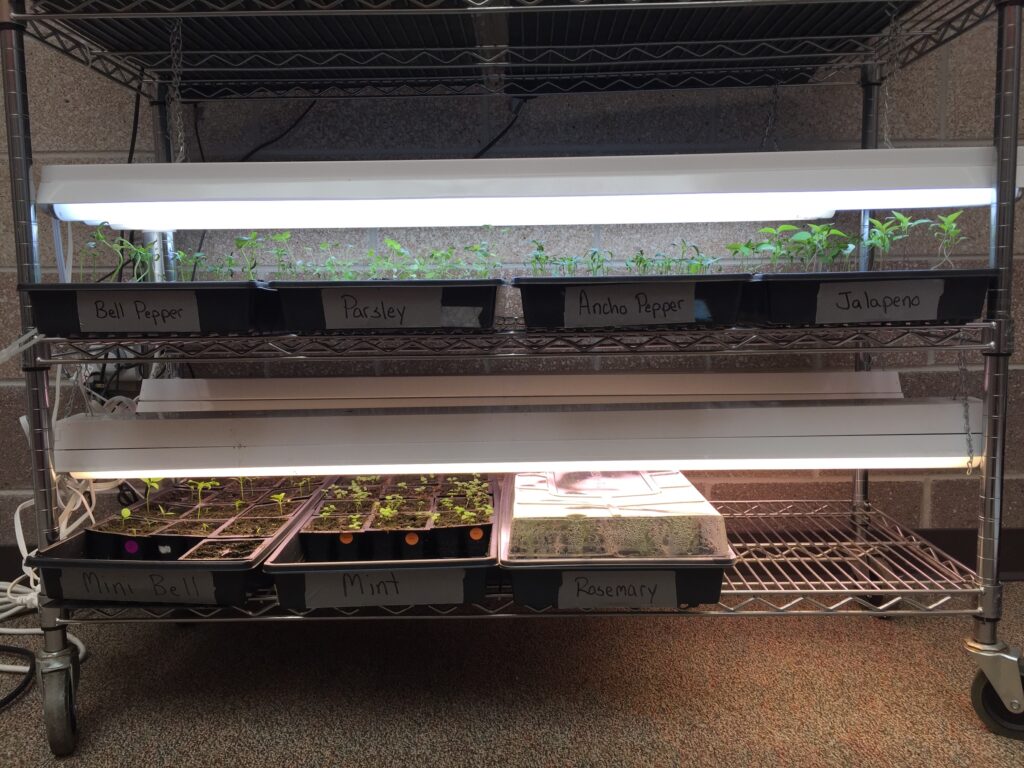
Over the years I’ve homed in how to start seeds in a school. Even though we lack a greenhouse, we’ve made it work for many years now growing seeds in the atrium in between hallways. Last year we grew over 1100 plants at this school in a space about 12’ wide by 3’ deep! While most schools won’t be growing this many plants, there are some basics that I would consider essential for any seed starting set-up.
This post contains affiliate links. If you use these links to buy something I may earn a commission. Thanks.
Light source
Even the biggest, brightest south facing windows won’t provide enough light to produce healthy flowers, herbs and vegetables. You can certainly grow plants without supplemental light, but they will be super tall with lots of space between leaves and weak stems (these are called “leggy” plants) and likely won’t transplant well into the garden. There are many different options for light sources depending on how much you want to grow. The most important thing to consider is that the light source has a flexible height adjustment as you want your lights to be about 3-4” from the top of the plants at all times. There are so many different grow light options, here are a few to consider.
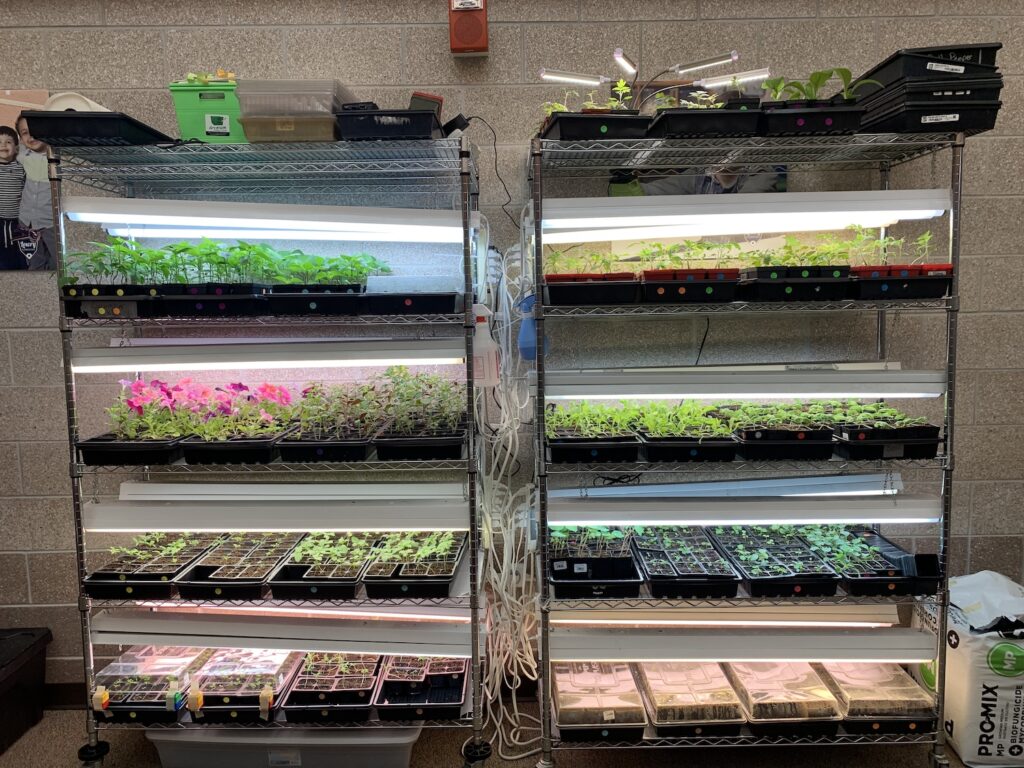
This is the setup one of my schools uses that allowed us to grow 1100 plants last year. We have several sets of 6’ tall commercial metal mesh shelves set up to have five shelves (we grow plants on four shelves and store supplies on the top shelf). Each shelf holds 4 flats, for a total of 16 flats per unit. Hanging from the underside of each shelf are two 4’ long shop lights, holding two fluorescent bulbs each. The chains on the lights attach to the shelf with an s-hook. This allows me to adjust the height of the lights. It’s cumbersome to change the height, but doable. We use just plain old fluorescent lights, rather than the more expensive grow lights. Grow lights emit light in the red and blue spectrums, while standard fluorescents contain a broader portion of the light spectrum. The exact portion of the spectrum depends on the warmth and color of the lights. I’ve used both grow lights and standard fluorescent and haven’t noticed a difference between the two, other than standard fluorescent are significantly cheaper. At some point I’d like to convert our fluorescent fixtures to LED fixtures, but for now it’s too cost prohibitive.
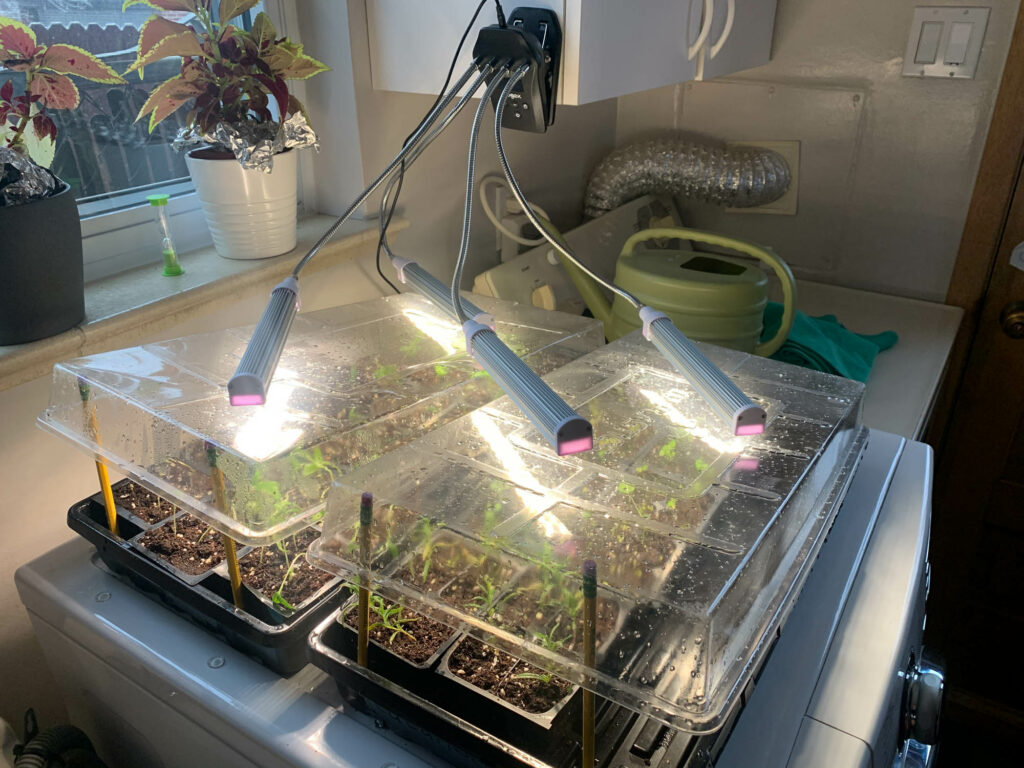
This clip-on LED light strip is the easiest and cheapest option and is what I use at home. Each clip on comes with four light strips. My plants are placed underneath a south window, so I am able to use just two light strips per flat and can therefore accommodate two flats per light unit. It has a built-in timer and you can turn on one, two, three or all four of the light strips.
For a small set-up or a dispersed set-up, the Jump Start Grow Light System is super easy to use. This is what I recommended schools use for many years before LED lights became more readily available and they are still a great option. This is also a nice option when you want to spread out the seeds among numerous classrooms. The lights are very easy to adjust in height and the whole system easily comes apart for storage in its original box. You can fit four flats underneath the 4’ model, giving you space to grow almost 300 plants, depending on what size pots you are using. The 2’ model fits two flats and up to 150 plants.
Pots
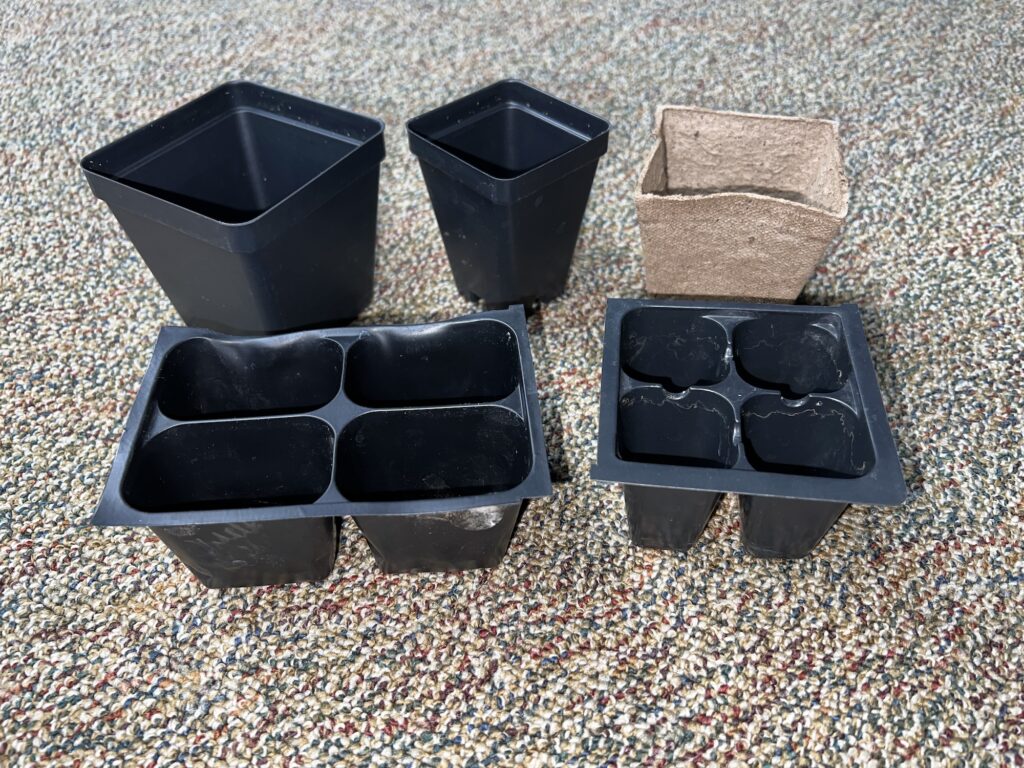
Seed starting and nursery pots come in a variety of sizes. It’s best to start your seeds in small pots like a small four-pack. You can also use six-packs, but I like the flexibility that four-packs provide. Then when they have at least two sets of true leaves, you can transplant them into a larger pot. The act of transplanting helps to stimulate finer roots to grow and results in healthier plants. For a school’s needs, you typically don’t need to transplant any larger than a 2.5” pot. As part of our plant sale, we offer flowers in four-packs. In this case we start and finish the seeds (no transplanting) in a large four-pack. Some seeds (squash family, root crops, celery, corn) don’t like their roots being disturbed during transplanting into the garden. I prefer to direct seed these plants into the garden, but if you must start them inside it is best to use peat pots where you can plant the entire pot to avoid root disturbance. I use peat pots only when necessary as they are more difficult to work with. You can typically buy all of these pots in small amounts at a local nursery or in bulk from a greenhouse supply store. We reuse the pots from year to year, cleaning them out and bleaching them after use so they are sterile for the next year.
Soil
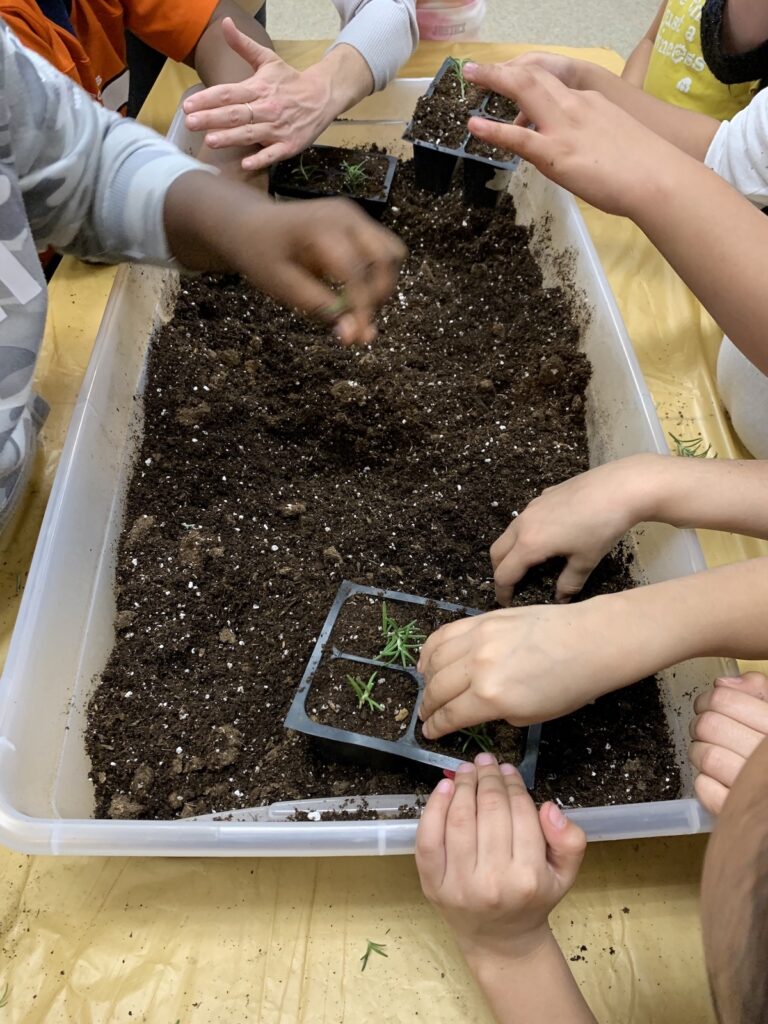
If you’ve ever gone to buy soil by the bag, it can be a bit overwhelming as there are many different kinds of mixes available, each with a different purpose in mind. For seed starting you absolutely want a mix designed for seed starting. These mixes are made with a variety of fine ingredients that allow for fine roots to easily grow, contain organic material to feed young plants, and optimize water retention without becoming soggy. Oddly enough, these mixes don’t actually contain any soil, which by definition is decomposed rock particles, but have a variety of organic materials. The kids always ask what the white stuff is – it is called perlite and is a volcanic rock. Perlite has low water absorption and helps prevent compaction of the soil. I like to use ProMix Organic Seed Starting Mix. This works great and it doesn’t contain any chemical fertilizers for students hands to come in contact with (our state child care licensing prohibits this for preschool programs). This is also available in large compressed bales from greenhouse supply stores, sold as Pro-Mix MP Mycorrhizae Organik.
Flats
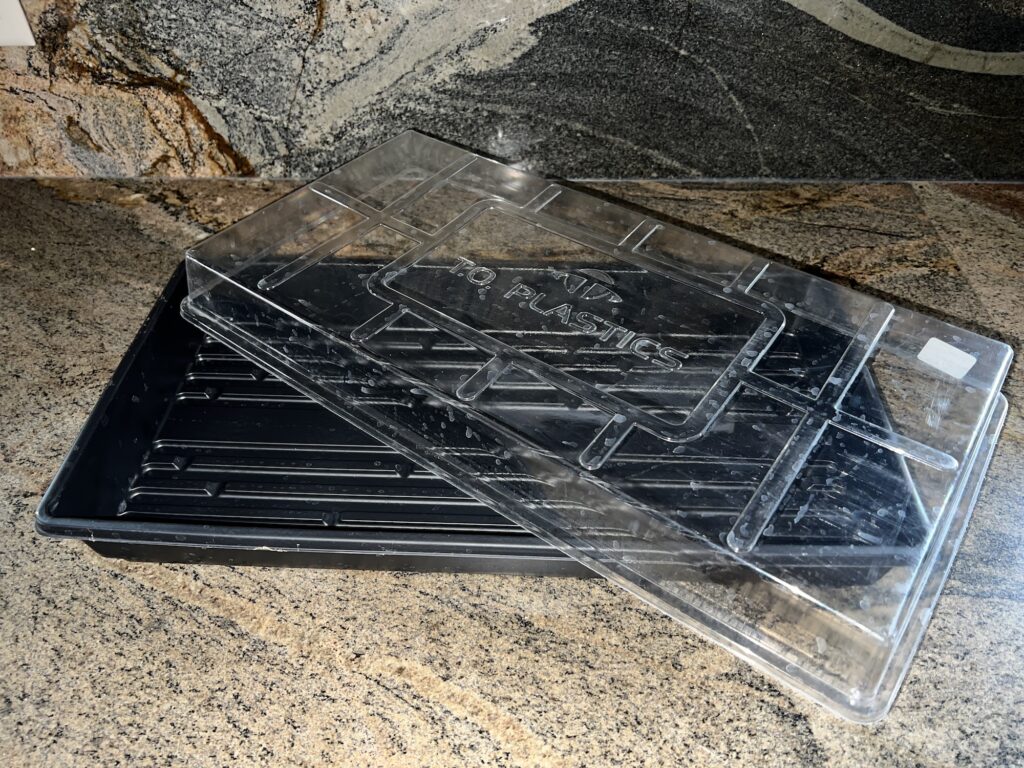
Using greenhouse flats without holes is critical to a seed starting system where water cannot drip on the floor. They not only act as a saucer to keep water from spilling on the floor, they also serve as the method in which to water your plants. I always bottom water the seeds filling the tray up with about one inch of water every 2-3 days or whenever the soil starts to dry out. This keeps newly planted seeds from washing away and is much easier than individually watering 1000 plants! This type of tray is available in varying thicknesses. The thinnest ones are flimsy and are hard to move around when there is water in them – they would work well in a stationary environment, but don’t hold up when you’re sliding trays in and out of shelves. The thickest ones are very sturdy, but they are more prone to breaking (and leaking). I’ve found the middle of the road ones (1.8 mil thick) to be the best. These TO Plastics 1020 trays are an industry standard.
Humidity Domes
Humidity domes are a key component of success when growing seeds outside of a greenhouse. Once a seed gets wet, if the seed dries out, it can no longer grow. So, maintaining consistent moisture prior to germination is critical. Humidity domes act like a miniature atmosphere trapping the water that has transpired (i.e. evaporated) out of the plants and then dropping it back down onto the plants. After I plant seeds and water from below until the soil is wet, the humidity dome traps most of that water and I don’t have to water very frequently. I typically keep the domes on until the plants have 3-4 sets of true leaves. The humidity domes shown are 2” tall and perfect for this use case. They also sell 7” tall domes which are great for if you have to leave your seedlings for an extended period of time without water (i.e. Spring Break). Once the seedlings are big enough to remove the domes, I slowly wean them away from the high humidity environment by propping up the edges along one side for several days. I’ve found Duplo blocks work perfect for this.
Heat Mat
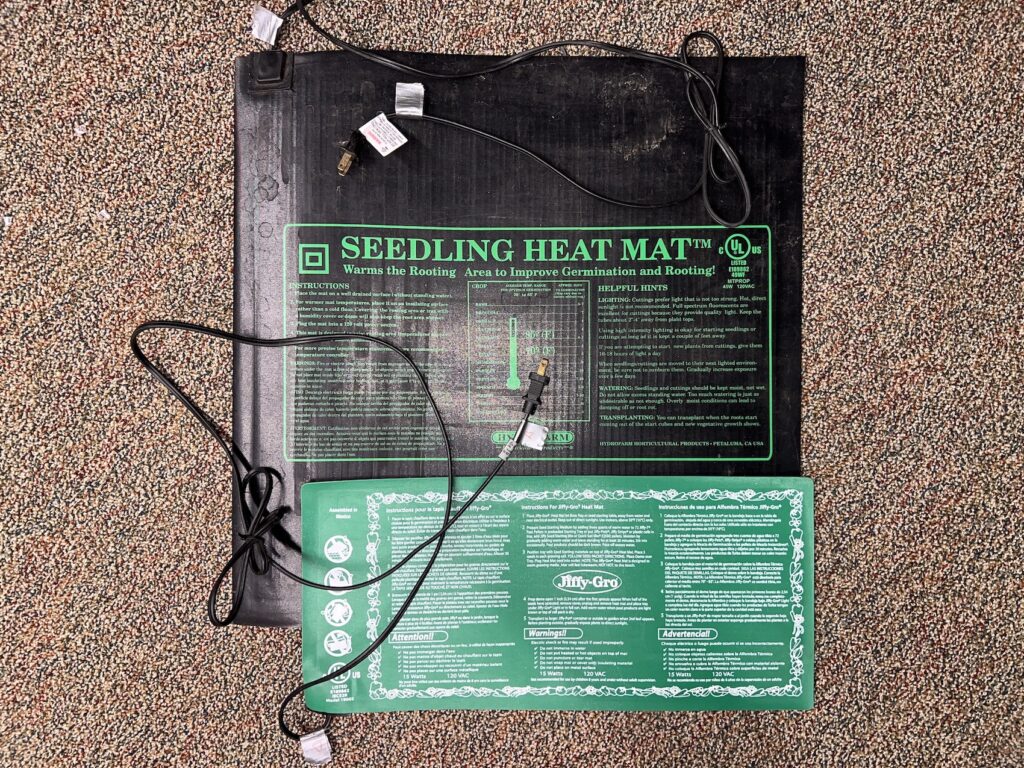
Some plants prefer cool temperatures for germination, while others prefer it to be warm. Plants in the nightshade family (tomatoes, peppers, eggplants), squash family (pumpkin, winter squash, melons) and certain herbs (basil, parsley, rosemary) prefer soil temperatures of 75°-90° for germination. Unless your school is really warm (and I’ve been in classrooms that are 80° year-round), you will likely need a heat mat to achieve decent germination with these plants. These are easy to use, you simply plug them in and put the flat on top of it. They raise the soil temperature 10°-15°. You can’t control the exact temperature, but I’ve never found that to be a problem. Alternatively, if you’re in an old school with a radiator, you can sometimes place your plant trays on top of the radiator panel to achieve this increase in temperature.
Water
I love having students involved in watering the plants, which means having a watering can that they can easily handle. Ikea’s PS 2002 watering can is the perfect size for students. It easily fits under a water bottle filing station or sink and is light enough for students to carry and maneuver. They do have an open top though, so students have to walk slowly to avoid spilling water. When I water alone, I choose a 2-3 gallon watering can with a small spout on it.
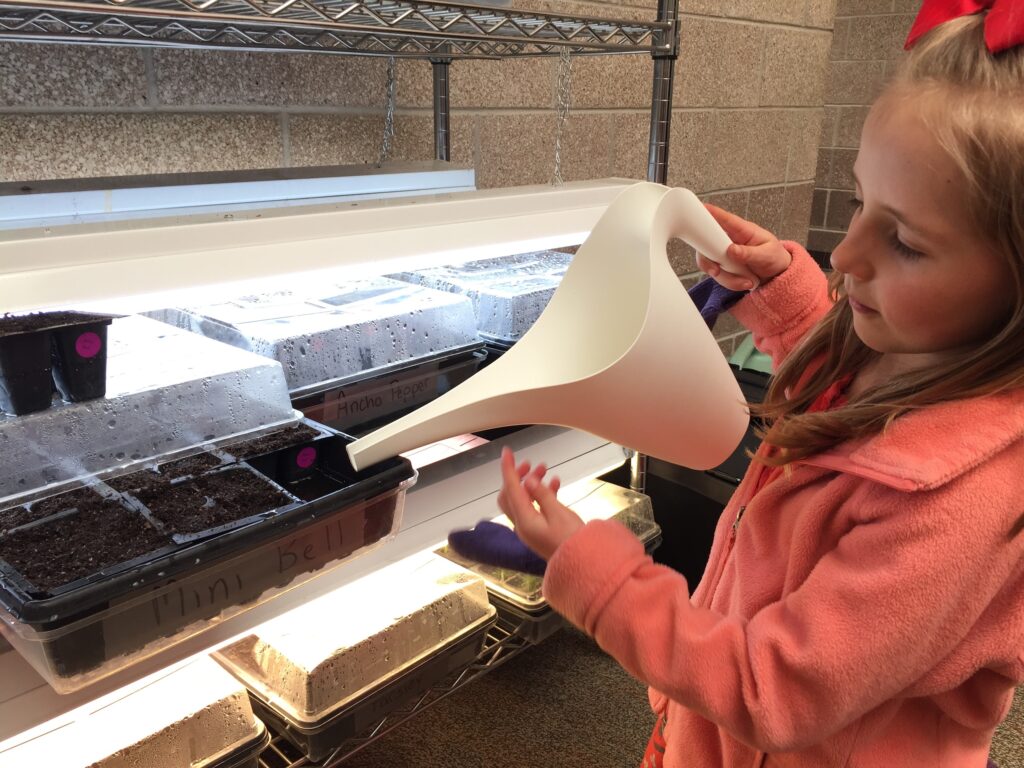
As I mentioned before, I always bottom water filling the tray underneath the pots up with water rather than pouring the water on top of the soil. The soil absorbs the water and moves it up through the pot through osmosis. We water every Monday, Wednesday and Friday, adding water to trays that are dry. I like to draw a silver line about 0.75” up from the bottom of the tray to mark where the water should stop. One of the Ikea watering cans is typically enough for one tray.
With this equipment on hand, it is possible to grow just about everything for your garden from seed. It can be expensive making the initial investment in the equipment, but most of it is reusable and your cost in subsequent years is just the cost of seeds. This year I spent $175 on seeds in order to grow 900 plants from seed and over 500 plants that we will direct sow in the garden. If our garden produces 500 pounds of food like last year, this equates to $0.35 per pound in plants (the cost of labor and other equipment is not calculated into this). Not bad for a small school garden!