Square Foot Gardening in the Schoolyard

Note the white string marking square foot sections in the center of the front bed. The onions had just been harvested and we were preparing to plant radishes in their place.

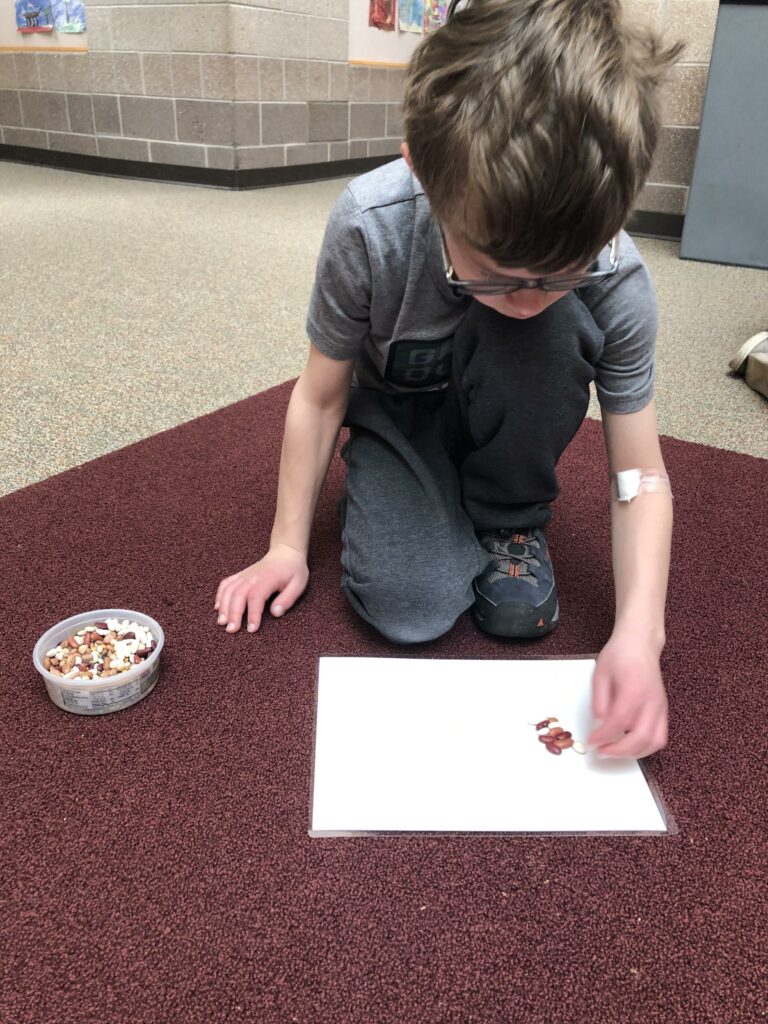
Square Foot Gardening is a popular method of organizing and planning a vegetable garden.  It provides an efficient way to grow large amounts of vegetables in a small space.  Its core idea is that the garden is divided into square foot sections and that a certain number of each vegetable can be grown in each square foot.  I find this method an easy way to plan and plant a garden with students.  It allows them to easily visualize the garden, how much space each plant needs and how many plants can realistically fit into the garden.  Then on planting day, the square sections provide an easy way to identify where plants go and to divide labor amongst the students.

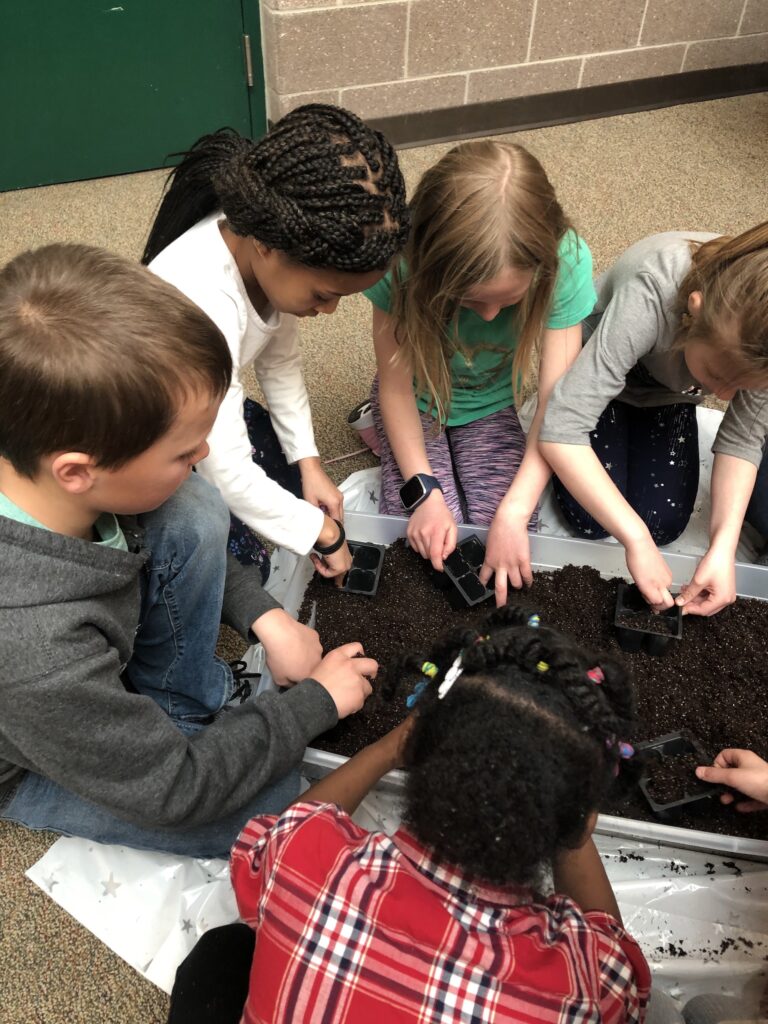
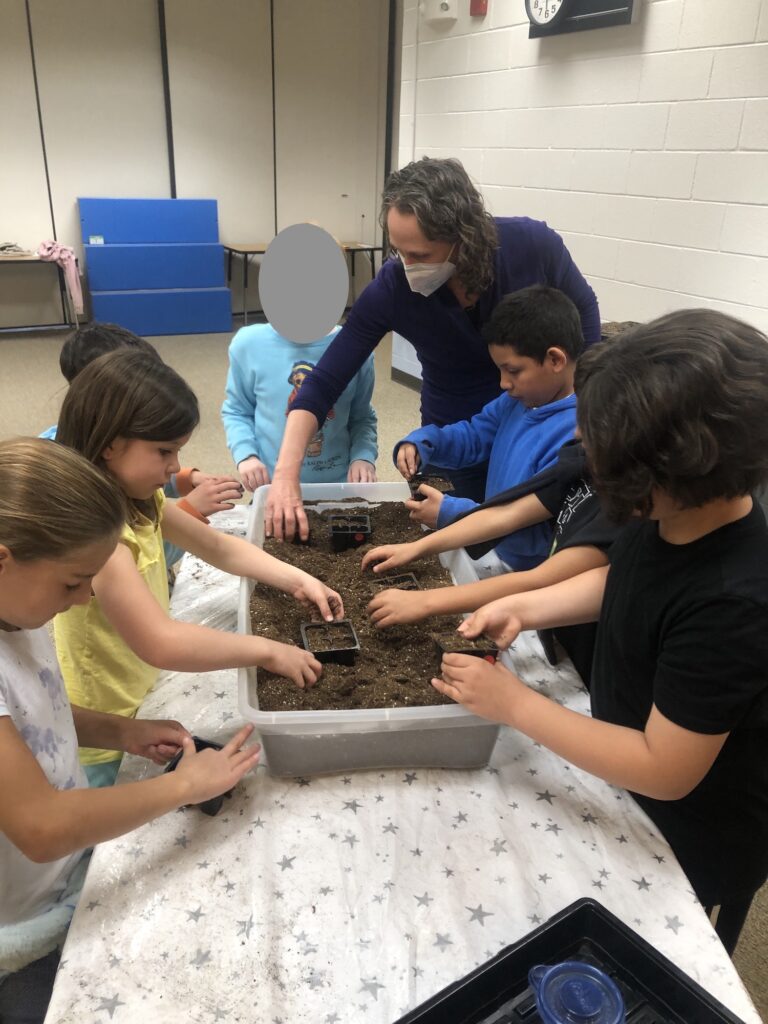
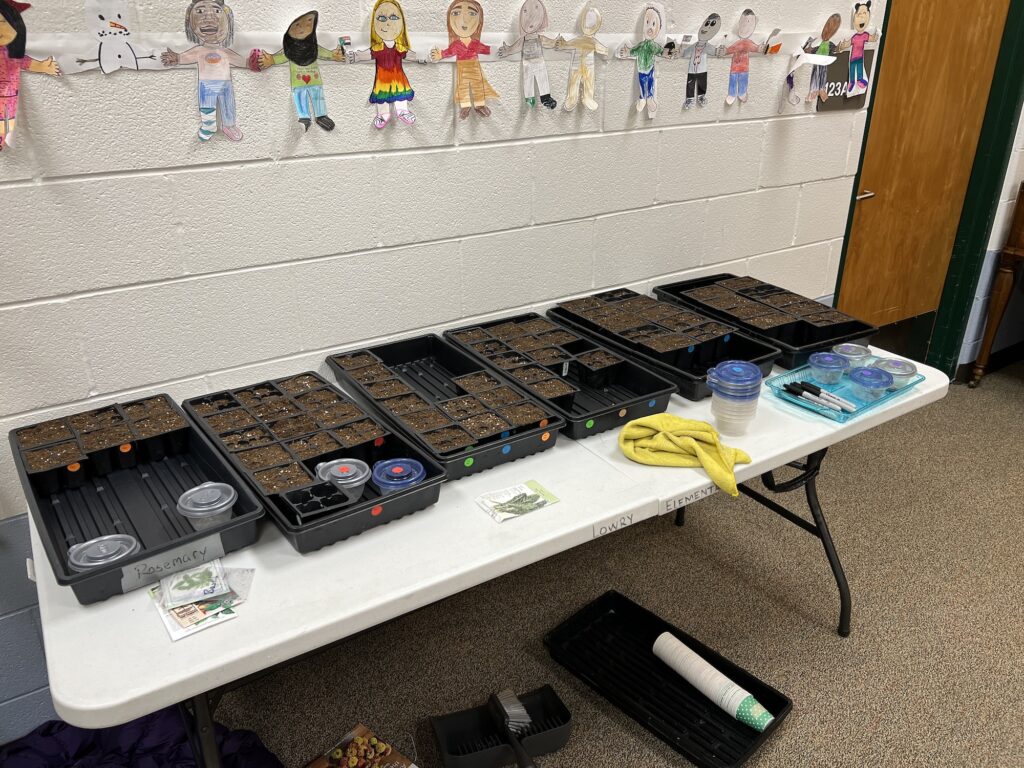
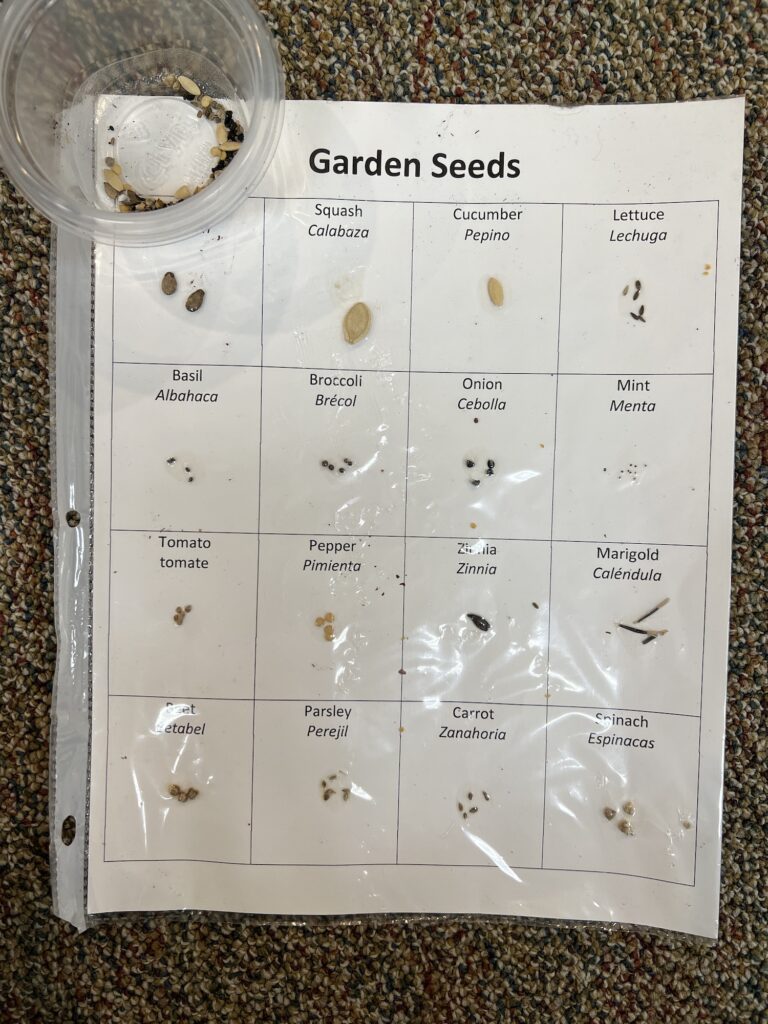
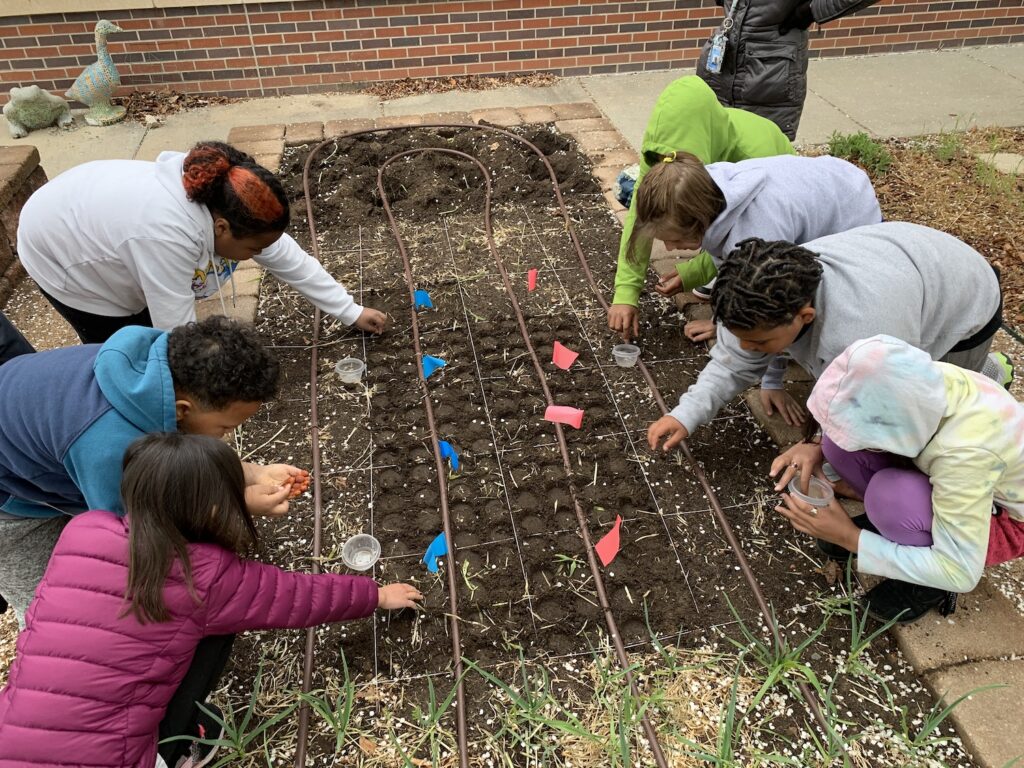
When I have students plan the garden, they first start by measuring the garden and drawing a map.  The map is drawn on graph paper so that every square foot in the garden is represented by one square on the graph paper.  You can create custom graph paper online so that the squares are a reasonable size for your students to use.  Then they get to decide what goes into each one of the squares.  Based on how much space each plant needs to grow, Square Foot Gardening developed a list of how many plants fit into one square foot.  I like to provide a custom template designed for that particular garden so that the students have a key to use as they fill in the squares.  The template shows what plants are available to plant and how many fit into each square.  Students can cut out the template and glue them onto the map or they can draw them onto the map.  I have even drawn a scale map on the classroom floor using masking tape to outline the edges of the bed (one a 1’ equals 3” or 4” scale) and the square foot sections and made cutouts out of construction paper so that students could easily manipulate the plan.  When I do it on my own, I use Microsoft Visio on the computer so that I can easily drag and drop the squares into the space.  

Once the square foot plan is created, you can practice some basic math problems:

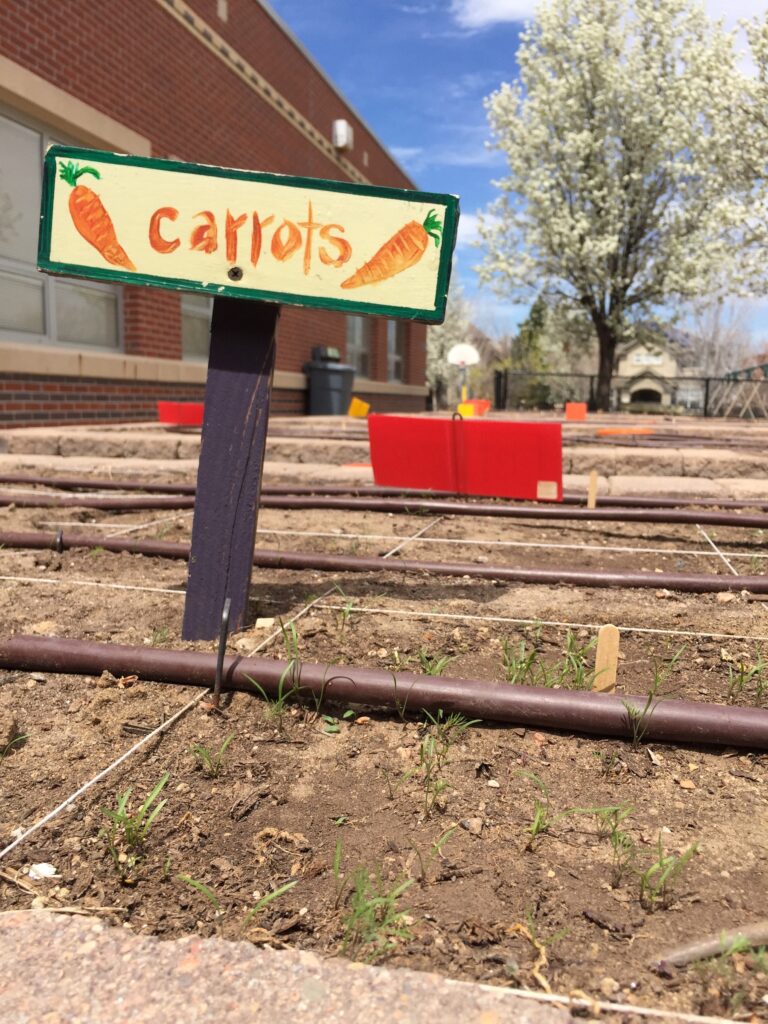
  • We have four squares of carrots with 12 carrots in each square.  How many total carrots do we have?
  • What fraction of our garden is planted in carrots?

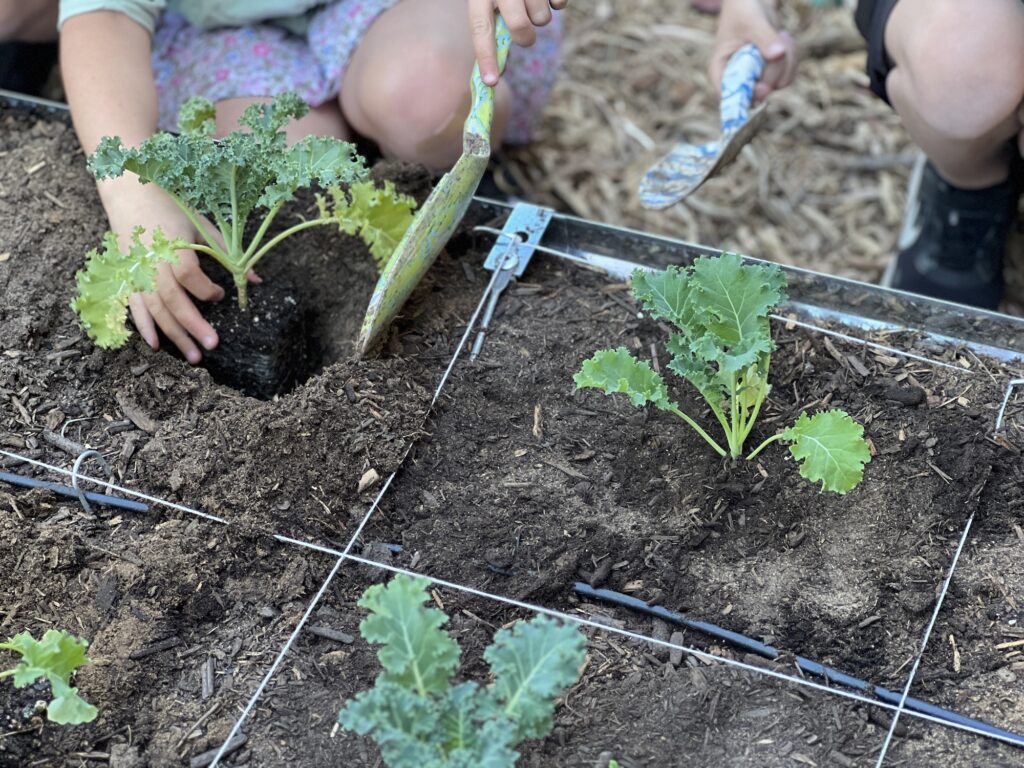
In the official Square Foot Gardening method, they recommend using wooden grids that are laid on top of the soil to divide out the garden.  Instead, I use cotton string that is anchored at the edges using garden staples.  It’s time consuming to lay out but is cheaper than building them out of wood and I don’t have to find a place to store them over the winter.  The grids come in handy on planting day, particularly for closely spaced seeds.  I don’t find it as useful for large plants like tomatoes that take four full squares per plant. Each student is assigned to plant a single square foot.  The grid allows them to easily identify the edges of their planting area and defines exactly how many plants/seeds will get planted into their section.  I often define their planting areas even farther by using colored flags or colored popsicle sticks to define what gets planted where (pink flags are for carrot seeds, blue flags are for beet seeds, etc.) and by pre-making the holes using a muffin tin.  To help students easily find their square, you can also label each garden bed as a coordinate grid.

This garden produced 502 pounds of food

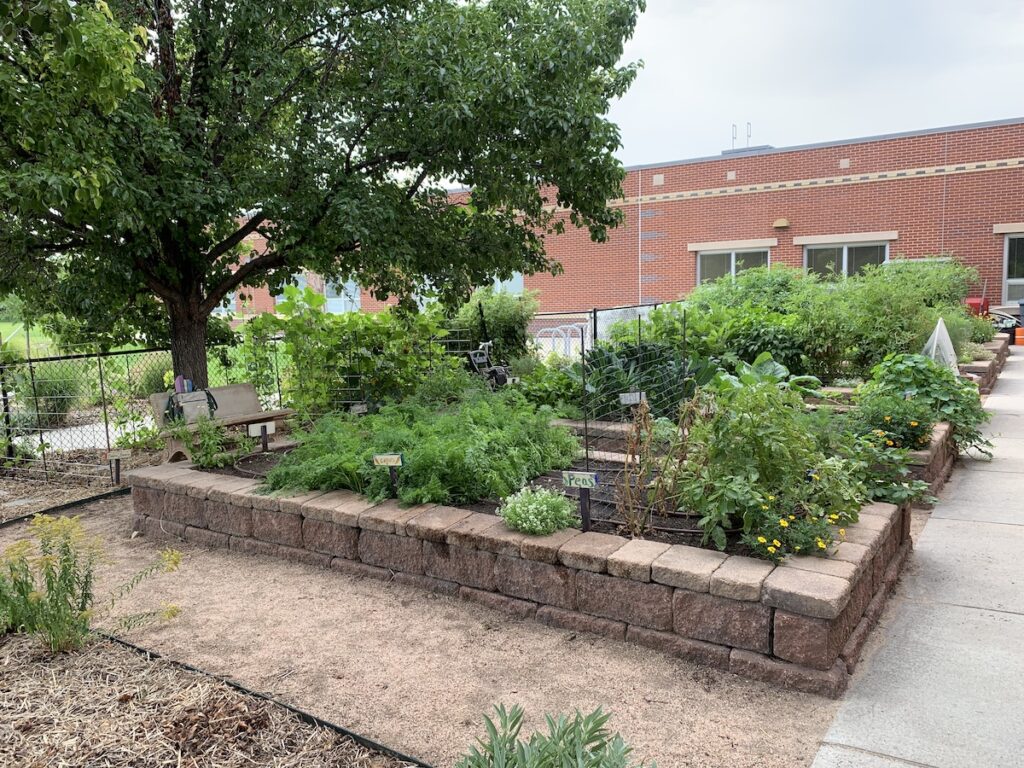
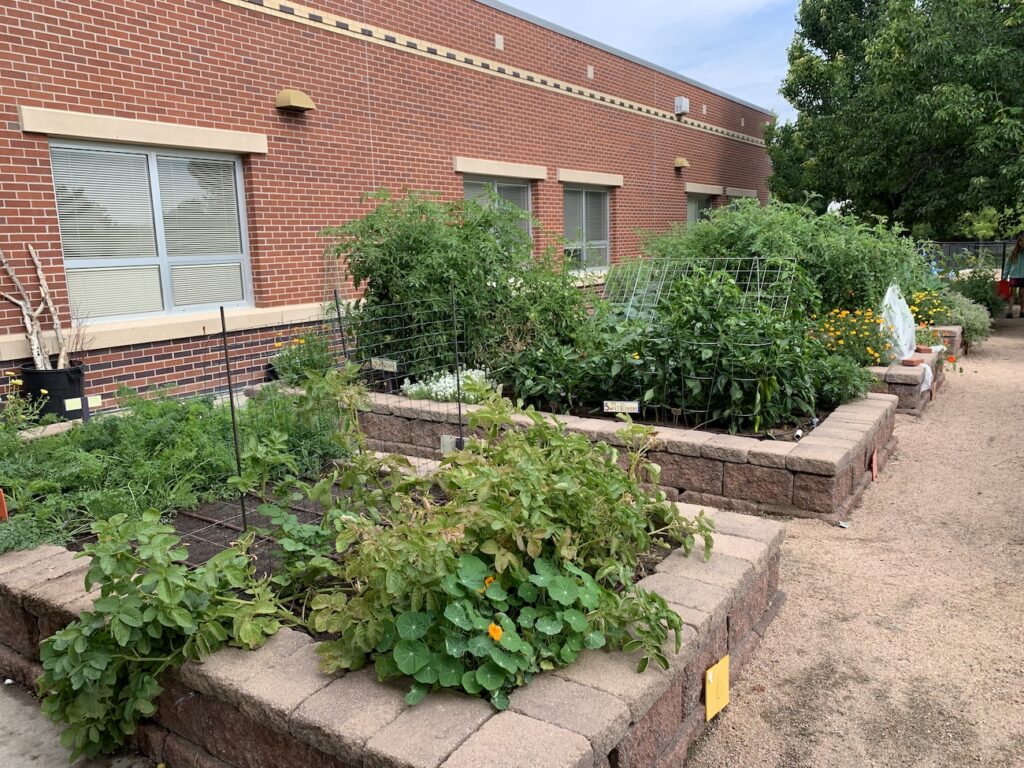
Another benefit of Square Foot Gardening is maximizing your area to grow a lot of food in a relatively small space.  Unlike traditional farming systems or large in-ground gardens where you need space to walk in between rows, square foot gardening bumps plants right up next to each other, giving each plant the exact amount of space they need and no more.  Below you’ll find a list of the plants we grow and how much space they need.  Additionally, you can use trellises to grow vining plants upward to maximize the space even more.  I use trellises (cattle panels from an agricultural supply store zip tied to rebar posts sunk into the ground) on the obvious vining plants like pole beans and peas, but also plants that typically spread out a great deal like cucumber, smaller winter squash (acorn, delicata, gourds, mini pumpkins) and melons.  I make diligent use of tomato cages for not only tomatoes, but also taller pepper plants and eggplants to help force the growth upward and not outward.  All of this compacted space pays off.  Last year we grew just over 500 pounds of food in under 400 square feet.

Plant Spacing for Square Foot Gardening
PlantSpacing
ArugulaScattered seeds
Basil4/square foot
Beet9/square foot
Carrot12/square foot
Chives2/square foot
Cilantro4/square foot
Collard Greens1/square foot
Corn4/square foot
Cucumber4/square foot on trellis (2 on each side of trellis)
Eggplant1/square foot
Garlic4/square foot
Head Lettuce4/square foot
Kale1/square foot
Mesclun/Salad MixScattered seeds
Okra1/square foot
Onion4/square foot
Oregano1/square foot
Parsley2/square foot
Peas6/square foot on trellis (3 on each side of trellis)
Pepper1/square foot
Pole Beans6/square foot on trellis (3 on each side of trellis)
Potato1/square foot
Radish12/square foot
Rosemary2/square foot
Sage1/square foot
Summer Squash1 plant/4 square feet
Swiss Chard4/square foot
Thyme1/square foot
Tomato1 plant/4 square feet
Winter Squash4/square foot on trellis (2 on each side of trellis)
Kale is planted as one per square foot

The one part of Square Foot Gardening that I don’t follow is their soil mix.  They recommend a do-it-yourself mixture of 1/3 compost, 1/3 peat moss and 1/3 vermiculite.  Here in Colorado, this mix just dries out too quickly and the materials aren’t very sustainable.  If we need to fill new beds, I will use a planters mix (50% topsoil, 50% compost) from our local organics recycling company.  If you are ordering from somewhere, be sure to check out their product first.  I’ve seen way too many “raised bed soils” that are way too heavy and filled with coarse, heavy materials to work well.  Also, instead of replacing the soil every year as the Square Foot Gardening method recommends, we use regenerative practices such as minimal till, cover cropping and adding compost to keep the soil healthy and fertile.

I honestly cannot imagine gardening in a school environment any other way.  It just makes sense from a planning, logistics and production perspectives. If you’re not already familiar with it, I encourage you to read more.  It’s not really that difficult to figure out and the payoffs are huge!   

Carrot seeds sprouting inside a square foot

Planting Seeds with Students

Planting seeds with a group of students looks quite a bit different than when I sit down and plant seeds all by myself.  It’s even different from when I plant seeds with my daughters.  Having a large group of students changes the dynamic and flow of the activity. As any teacher knows, successful activities in the classroom are made or broke by how you set up the activity and seed starting is no exception.  Over the years I’ve developed a set of techniques and strategies that sets the seed planting up for success.  Here are the things I recommend for anyone planning to plant seeds with a group of students.

PREP MATERIALS AHEAD OF TIME

This one probably goes without saying, but the more I can have prepped ahead of time the smoother the planting will go.  Prior to even starting our seed planting sessions, I do the following set-up.

This post contains affiliate links. If you use these links to buy something I may earn a commission. Thanks.

Label pots and trays semi-permanently.  Each and every pot we use is labeled with a small dot sticker that has the name of the plant printed on it.  These are fairly waterproof and don’t peel off very easily. The dot stickers will come off when soaked in water (i.e. when were cleaning and sterilizing the pots after use) but otherwise stay on really well, even during robust watering sessions.  The trays are also labeled with a sticker so it is easy to see what is growing in the tray.

Transfer seeds to containers.  I transfer the seeds from the seed packet into half cup storage containers with lids.  This allows students to easily help themselves to seeds and minimizes spillage.  I typically have one container for every 4-6 students.  Each container is labeled with the same sticker as the pots in order to minimize mix-ups.

Put soil in a long, short container.  I like to use under the bed storage containers to hold the soil.  This allows multiple students to easily access the soil at one time.  The 41 quart size is a perfect size to allows me to easily handle the tub.  With one soil tub in the center of a 6’ table, 6-8 students can gather around the table and have access to the soil.  With two of these tubs on a table, 10-12 students can gather around.  Depending on the group of students and how complicated our planting is, sometimes I use two tables with one tub on each and sometimes I use one table with both tubs on it. 

Put a lid on your soil.  Students love putting the hands in the potting soil and moving the soil around.  It is a great sensory experience for students, but it means that the soil gets spilled and the students aren’t listening to instructions.  I take the lid off only when students are filling pots with soil.  For this reason, I like to have a lid that is easy to get off and on.

Cover your table with a light-colored tablecloth.  A tablecloth helps make clean-up go smoother.  The light color makes it easier to see spilled seeds.  I prefer using a heavy-duty vinyl tablecloth as the lighter duty plastic tablecloths get torn by the students fiddling with it.  I use bedsheet straps under the table to hold the tablecloth in place.  Anything on top or along the edge of the table gets fiddled with by the students.

HAVE A PLANTING ROUTINE

Just as the set-up matters, how I go about planting the seeds ensures that the seeds are planted correctly.

Control your group size.  Ideally I like to plant with 8-10 students at a time, although I can manage with 12-14 students.  When it goes above this number, I can’t easily keep my eyes on all students to ensure that they are correctly planting their seeds.  If this is your first time planting with a group, I would start small with 4-6 students at a time.

Have an additional activity.  I typically work with one classroom of students at a time. Half plant with me while the other half is doing an independent activity.  This independent activity keeps them engaged exploring seeds and planting while I am planting.  If I am working in just one classroom, the class can be doing normal classroom work independently while I call up small groups. 

Talk about the holes in the bottom of the pot.  I always start planting by showing students the pot and asking them what they notice.  The holes always come up.  I explain the holes by asking what would happen if their head got stuck underneath the water – they couldn’t breathe and they would die (drown).  Then I explain that plant roots are the same way and if they get stuck under the water for a long time, the plant can’t breathe and it will die.  The soil in the pot sucks up water like a sponge, but it can’t hold an endless amount of water.  If too much water is added, the extra water comes out the holes so the plant can grow.

“When you’re filling the pot with soil, the pot stays in the soil tub.”  I always repeat this several times so students understand.  It helps keep the soil contained in the tub, otherwise the soil overflows the pot and ends up all over the table (and the floor, and the students….).

“When you’re putting the seed in the pot, the pot goes on the table.” Once students have filled their pots with soil, the pot goes on the table and the lid goes back on the soil tub.  Then I give them a tub full of seeds.  This prevents seeds from being spilled into the soil tub.  I learned this one the year that someone sprinkled/spilled basil seeds into the soil tub and every plant after that had basil sprouting up next to it.  I pulled so many basil sprouts that year!    

Minimize putting seeds into holes.  Students love to make holes and they are quite often too deep for the seed meaning the seed doesn’t have enough energy to make it to the top of the soil. Only the biggest seeds (squash family and nasturtium) get holes when we plant.  The rest of the seeds (¼”- ½” of depth) are placed on top of the soil in the pot and then some soil is pushed over from the side of the pot to cover it up and gently patted down.  Seeds that need ½”-1” of depth get a hole made by one finger pushed into the soil that stops when the first knuckle starts going into the soil.  We find this knuckle together as a group before we begin.

Demonstrate what to do.  Showing students what to do is worth a thousand words.  As I work, I have students put their hands behind their back so that they aren’t tempted to start playing in the soil. I start by filling the pot with big handfuls of soil and pushing the soil down hard (not superhero hard) with my fingers.  Then I emphasize putting the pot on the table to put the seeds in.   I’ll emphasize how many seeds we’re planting and then take more seeds than I need and place them in my palm.  Then I count how many seeds I have and put back the extras I don’t need. I place the seed(s) on top of the soil and show them the seed so they can see it on top.  Then I push a little soil from the side of the pot with a big flourish to emphasize and exuberantly pat the soil on top of the seed. 

Use checkpoints to ensure students are doing it properly.  As we work through the planting process, I am constantly checking on the students to make sure that they are correctly following the steps.  I’ll hold the entire group from progressing to the next step until I’m sure everyone is on track.  Before I take the lids off the seeds and we start actually planting, I make sure that everyone has the correct amount of soil and it is properly packed down.  Once everyone has done that, we put the lid on the soil tub and the seeds come out.  As students are working, I try to look to see they have the correct number of seeds.  As they bring their pot to the tray, I make sure the seeds are covered up. 

Clean up the soil on the table in between groups.  I keep a dustpan handy to sweep the soil from the table away.  Kids love moving the soil around and the sound of their hands and soil moving around on the tablecloth is noisy and distracting.  Plus having a clean tablecloth makes it easier to see and salvage seeds when they get spilled.  Because seeds do get dropped and spilled in this soil I always dispose of this soil in the compost or trash rather than putting it back into the soil tub.  Otherwise, I end up with mystery plants sprouting adjacent to my known plants.

While it seems like a lot of work for you and somewhat controlling for the students, there is lots of room for error in planting.  Over the years I’ve learned from my mistakes and this process really helps eliminate most of that error.  Most of our seeds germinate with the plant that should be in the pot, only one plant sprouts and the seed is centered in the pot.  The students still get the opportunity to feel soil between their fingers and to witness the process of a tiny seed sprouting and growing something amazing.  It is such a different experience from the typical day to day classroom routine and they look forward to planting each and every time!

Seed Exploration and Curriculum Connections

When you’re in the process of starting seeds with your students, there are a variety of complimentary seed exploration activities you can use to help students better understand and appreciate the wide diversity of seeds and how amazing a tiny little thing can be.  These cross-curricular activities are also a great way to introduce or reinforce the core curriculum concepts you’re teaching in your classroom.

Over the years I’ve accumulated an assortment of seeds to use with students.  I’ll save seeds that are past their use by date (different seeds have different periods of time that they are viable past their sell by date) or I’ll buy seeds from the dollar store. Just yesterday I saw that our local Ace Hardware had American Seed packets for $0.25 each.  This assortment is nice because the seeds frequently correlate to what we are planting.  However, some of these seeds can be quite small and don’t work well for tiny hands or are easily lost as they are explored.  When I need to have larger seeds, I like to use Bean Soup mix from the grocery store.  These can include 15 or more different varieties of beans and other members of the pea family.  They tend to be quite colorful and include a variety of sizes and shapes.  I store both of these seed mixes in plastic containers for use from year to year.

Seeds come in many shapes, sizes, colors, and textures. Exploring this diversity is a great way to build rich, descriptive vocabulary with your students. Using your seed assortment, have students brainstorm words that describe each seed.  Encourage them to think of synonyms for the words or to build upon their description to make them more complex.  You can use a Venn Diagram to help compare and contrast different types of seeds.  Either prior to or following this, you can have students sort the seeds into unique groups, encouraging them to sort in ways that don’t just isolate the same seeds with each other.  This list of words and phrases can then serve as a jumping off point for a variety of creative writing activities:

  • Write a story about a seed that feels different from everyone else and how they learn to love being unique.
  • Create a creature that uses one of the seeds as part of its body (similar to how a thumbprint creature involves the thumbprint) and write a story about it.
  • Write riddles to describe the seed.
  • Write poems about the seeds or how they grow into a plant.
  • Create an advertisement for the seed.
  • Design a seed packet.
  • Write a fairy tale about the seed and what it will become.
  • Write a story about how the seed grows and what it turns into.  Does the way it starts out predict what it will become (ala The Tiny Seed).

Seeds are a great way to introduce or reinforce a variety of math concepts.  If you think about seeds as a counter or manipulative, you can start to envision the many ways you can use them.  Some ideas to start with include:

  • Sort seeds into different groups.  
  • Calculate the fraction or percentage of each seed in the mixture.
  • Make patterns with the seeds.
  • Make sets of twos, fives, tens, twenties, etc.  Skip count to determine how many total seeds you have.  
  • Line the seeds up end to end on a line.  How many of each seed will fit on the line?  Compare the size of the seed to how many will fit on the line.  Divide the length of the line by the number of seeds that fit to determine the average width of each seed.
  • Measure the length, width and weight of a seed.  Since seeds are so small, this is a good opportunity to use the metric system, introducing millimeters and centimeters.   Calculate the mean, median and mode for each type of seed.
  • Calculate how many of seed A will equal one of seed B.
  • Compare and contrast the measurements of seeds using greater than, less than and equal to language and symbols.
  • Calculate germination ratios when you grow the seeds.  How many total seeds did you plant vs. how many actually grew.  Some seed companies list the germination ratios on the seed packet – how did your results compare?

As students begin to notice similarities and differences among the seeds, you can use these to introduce plant families and scientific classification and nomenclature.  Seeds from within the same plant family have very similar shapes and textures, although they tend to vary by color and size.  You can start by analyzing the seeds of each plant family for similarities and differences and then begin to look at how other characteristics of the plant (leaves, flowers, fruits, plant size, plant origin) are similar and different within the same family.  

Books are a great way to supplement your exploration of seeds.  There are so many high quality books about seeds, plants and gardening.  You can do read-alouds with them or put them in your classroom library for students to explore on their own.  When I am working with large groups of students planting seeds, having half of the class explore these books while the other half plants is a good management strategy.  Here are a few of my favorites:

  • The Big Seed by Ellen Howard
  • The Carrot Seed by Ruth Krauss
  • Flip, Float, Fly:  Seeds on the Move by Joann Early Macken
  • A Fruit is a Suitcase for Seeds by Jean Richards
  • Miss Rumphius by Barbara Cooney  (While a great story, there are some concerns about just spreading seeds wherever and creating weed problems, so read with some caveats to your students.)
  • A Seed is Sleepy by Diana Hutts Aston
  • Seeds by Ken Robbins
  • Seeds by Patricia Whitehouse
  • The Tiny Seed by Eric Carle

Including even just a few of these activities not only helps deepen your students understanding of and appreciation for seeds, but it can easily help students master your grade level learning objectives.  It’s a win-win for everyone!

Seed Catalogs as a Learning Tool

As I child I loved to look through seed catalogs.  I would leaf through them and imagine what I would put in my garden.  Sometimes I would even be allowed to cut out the pictures and I could glue them together to make a garden picture.  Now, it is my own two daughters who lunge for the seed catalogs when they arrive.  They flip through oohing and aahing over all of the different fruits and vegetables, dreaming about the what ifs….

“Mom, can we have a lingonberry, it’s in our zone.  Then we could make our own lingonberry jam”. 

“Can we please have the red yard long beans.  They look so cool!”

“Ooh, white pumpkins!  Wouldn’t those be fun to have?”

Seed catalogs are a great tool to engage students in planning the garden while also gaining practical experience in reading, writing, and math.  I always save my seed catalogues each year so that students can use them,  but I’ve also had success calling up the some of the bigger seed catalogs and having them send me a classroom set.  Students love looking through the catalogs just as much as my daughters and I do.  You can harness their excitement over the plants to practice academic skills while aIso planning your garden.  Here are some possible ways you can use seed catalogs in the classroom.

Descriptive Writing – Read the descriptions for various plants.  Identify the adjectives used to describe the plant.  Which adjectives capture your attention more than others.  Have students write their own description for a plant to help market the plant as a choice in your garden.

Riddles – Students can choose a variety and then write a riddle that describes the variety.  Have other students try to guess what it was.

Compare and Contrast – Have students select two or three varieties of a plant.  Read through the description of each one.  How are they the same and different.  Create a Venn Diagram to capture the attributes of the selected varieties. 

Persuasive writing – Choose a plant and write a persuasive essay on why that plant should be chosen for the garden.

Money – Have students pick out plants for a dream garden.  Using the prices listed in the catalog, calculate how much the garden would cost.  Have students calculate sales tax to get some practice with percents and decimals. Build a budget for the garden.

Measurement – Using the width and height listed for each plant, create a life size drawing of the plant.  Put all varieties of a certain species in order from smallest to tallest.

These are just a few of the possibilities to utilize seed catalogs as a teaching tool.  The next time you need a way to teach or reinforce a new concept, pull out your seed catalogs.  Perhaps they’ll provide some curriculum inspiration in addition to garden inspiration!